RF 433 PUSH BUTTON LED
VIA ARDUINO


2. Copy paste satu persatu sketch/program di bawah ini ke dalam software arduino
Code untuk transmiter !

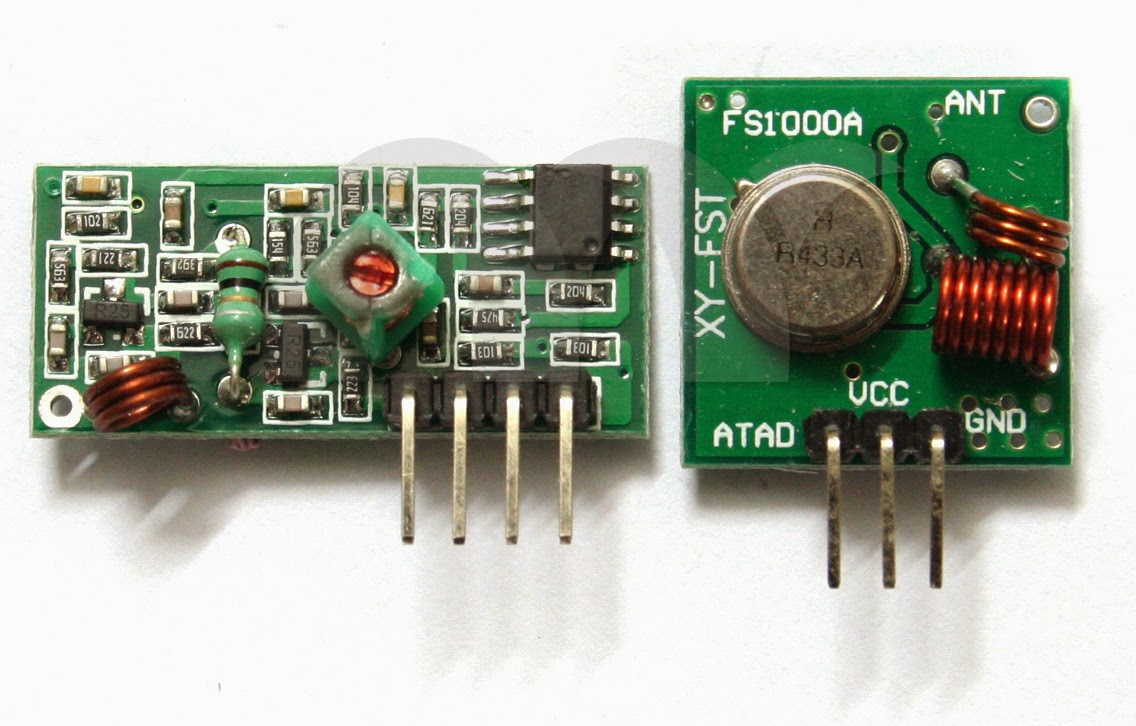
Salam elektro,berjumpa lagi dengan aruselektronika,apa kalian pernah komunikasi data melalui kabel ? nah jika sudah pernah,rf ini tidak jauh cara kerjanya seperti itu,yang membedakan komunikasi rf yaitu melalui radio frekuensi yaitu 315 MHZ,330MHZ,433MHZ,komunikasi tersebut terjadi karena adanya module RX dan TX,rf module dapat berkomunikasi sejauh 100m,tanpa halangan dinding,tegangan yang dipakai untuk rx tx module 5v,untuk spesifikasi yang lainnya bisa kalian baca disini,nah pada tutorial kali ini,aruselektronika akan mencoba module tersebut dengan menggunakan 2 board arduino,untuk penjelasannya silahkan kalian simak.
TOLONG BACA DENGAN DETAIL !
Siapkan alat dan bahan :
- Arduino Uno/Nano/Mega (sama saja) (untuk module RX)
- Arduino Uno/Nano/Mega (sama saja) (untuk module TX)
- RF module RX & TX
- Breadboard
- Kabel jumper disesuaikan
- Led (bebas)
- Resistor 220 ohm
- Push button (bebas)
- Laptop
- Software arduino ide
- Kabel usb
- Download Library <VirtualWire.h> (tutorial instal library klik disini)
- Download skematik pdf
2. Copy paste satu persatu sketch/program di bawah ini ke dalam software arduino
Code untuk transmiter !
/*
 * RF Transmiter
 * By Fickry Muhammad
 */
#include
const char *message = "aruselektronika.blogspot.co.id";
int on = 2;
int off = 3;
int led = 13;


void setup() {
pinMode(on,INPUT_PULLUP);
pinMode(off,INPUT_PULLUP);
pinMode(led,OUTPUT);

vw_set_ptt_inverted(true);
vw_set_tx_pin(12);
vw_setup(4000);
}

void loop(){

  if (!digitalRead(on))
  {
  message="X";
  digitalWrite(led,HIGH);
  vw_send((uint8_t *)message, strlen(message));
  vw_wait_tx();
  delay(100);
  }
  else
  {
  digitalWrite(led,LOW);
  }

  if (!digitalRead(off))
  {
  message="A";
  digitalWrite(led,HIGH);
  vw_send((uint8_t *)message, strlen(message));
  vw_wait_tx();
  delay(100);
  }
  else
  {
  digitalWrite(led,LOW);
  }
}
Code untuk receiver
/*
 * RF Receivier
 * By Fickry Muhammad
 */
#include
int led = 13;
void setup()
{
  pinMode(led,OUTPUT);
  vw_set_ptt_inverted(true);
  vw_set_rx_pin(12);
  vw_setup(4000);
  vw_rx_start();
}
void loop()
{
  uint8_t buf[VW_MAX_MESSAGE_LEN];
  uint8_t buflen = VW_MAX_MESSAGE_LEN;

  if (vw_get_message(buf, &buflen))
  {
    if(buf[0]=='X')
    {
    digitalWrite(led,HIGH);
    }
    if(buf[0]!='X' || buf[0]=='A')
    {
    digitalWrite(led,LOW);
    }
  }
}
3. Verify program arduino,apabila tidak terjadi error lanjut dengan proses upload4. Upload program satu persatu ke masing masing board arduino,seperti biasa atur terlebih dahulu port,board yang kalian gunakan,apabila succes akan muncul tulisan done uploading,apabila ada yang belum tahu bagaimana cara upload code/sketch ke board arduino bisa baca disini
5. Sekarang kalian coba tekan tombol push button pada module arduino RF TX dan coba kalian lihat led pada module arduino RF RX,jika led nyala maka module rf kalian sudah benar benar berfunIgsi,tinggal kalian kembangkan untuk aplikasi lain,contohnya monitoring data dari jarak jauh
RECOMMENDATION UNTUK MENGGUNAKAN RF PT4304
Fungsi lebih stabil,jangkauan lebih luas
FUNGSI-FUNGSI DARI LIBRARY
Configuration Functions


Itu include nya ga ada terusannya bang, nama include nya apa
BalasHapus